I may or may not have worked in my classroom for 6 hours today... Its SATURDAY people. As in the LAST Saturday before school begins for reals. Because let's be honest, its not real until the kids arrive! Until then its all sunshine and rainbows and lollipops. There can still be sunshine and rainbows after the kids arrive, but no lollipops!
So real quick let's review what I was working with:
Teeny tiny. At least compared to my last classroom. And I must have worked a miracle or something because people were coming into my room all the time and remarking on how big it looked. Then they would go next door to a room that is the mirror image of mine and complain about how small that room was. Seriously people? They are the same size. I'm a little proud of myself. I was really concerned about how it would work but thanks to an open-minded administrator, helpful custodians, expert advice (that's you Meekster), and a fully funded Donor's Choose project it came together smoothly. Soooooooooooooo here it is!
Umm, can we talk about how awesome this is??!? I WISH this was my idea. Totally jacked it from
Pinterest. I tried to follow the link back to the original source but I hit a dead end... Whoever you are, you are amazing.
I spent a few meticulous hours with a ruler, pencil, google image search and paints working on the house. Which is silly because the house in the movie is anything but meticulous. This is where my crazy came into play.
I used a scrunchy paper boarder to give the essence of clouds and covered the plain blue paper with blue
SmartFab for a softer feel.
I've been told my "Welcome" bunting is a fire hazard. We can't hang anything on, above or near our doors unless it is on a bulletin board or cork strip.
This is my small group reading/math/whatever area. The stools are from IKEA. Can't beat $6 seating.
My job chart.
Student cubbies, book baskets, general cute-ness...
I got the green bunting garland from the party section of Target. I made the pom-poms myself. The book baskets won't stay there forever. The top of the cubbies is a bit too high for many of my littlest third graders. Once they learn how to make room for the boxes and the text books in the cubbies they will move down.
While I miss the storage, I like the shelf made by the top of the cubbies.
LOVE Grumpy Cat. Here she is with a picture of my two grumpies at home.
Just a little detail about the book boxes... Notice they already have books in them? The first day of school isn't until Tuesday. But it is important that students have books to read at their level on day one so I selected a few titles based on their interests (if I know the child) and their reading level at the end of the school year. It's not difficult and it really pays off. At my old school, they were very particular that students have books on day one so I got into the habit of doing this. I don't know if teachers at my new-ish school do this or not but it isn't directed by the reading people or admin. Do you put books in your kids book baskets before they arrive? Just curious. Moving on...
My library. Rug $30 from Wal-Mart.
Fred the Flamingo.
Storage/Shelving
Back up front to the small group and large group areas. I got the chair 80% off at Pier One because one of the legs is bent. Doesn't bother me. I also put out many of the books I will use the first week of school. Kiddos were really interested in checking them out during our Open House on Friday.
Sneaky hide-away for copies and what-not.
Calendar and birthday board.
That's going to bother me all year. Let's hope at least one of those October birthdays moves.
The inside of my teeny tiny closet.
There WAS only one shelf. That's why the head custodian is your best friend. That man found me a second shelf and doubled my closet storage. Love that man.
Whole group area.
More books, encore schedule, pom-poms, cute-ness...
This is my listening center. Until recently, this $5 yard sale outdoor coffee table was in my house. This was where I did my nails. I bought a new coffee table so this one found it's way into the classroom. I considered painting it but I like the rustic look. Plus it was just too much work. The floor pillows are actually Papasan stool cushions but they were cheaper at 50% off than the cheapest option I could find on Amazon, and the reviews were terrible. I'm happy with these. I sat on one during our all-day inservice the first day back and my butt thanked me for it.
More cute-ness.
My student laptops.
Windows. I have a great view of a nice little wooded area and rose bushes.
Printer station and paper storage.
My area. I got rid of the HUGE teacher desk and will just use this computer cart.
M is for MOLER.
The little fishy was a gift from one of my students last year who will be in my class again this year. I wonder how long it will take her to notice I put it up on the wall.
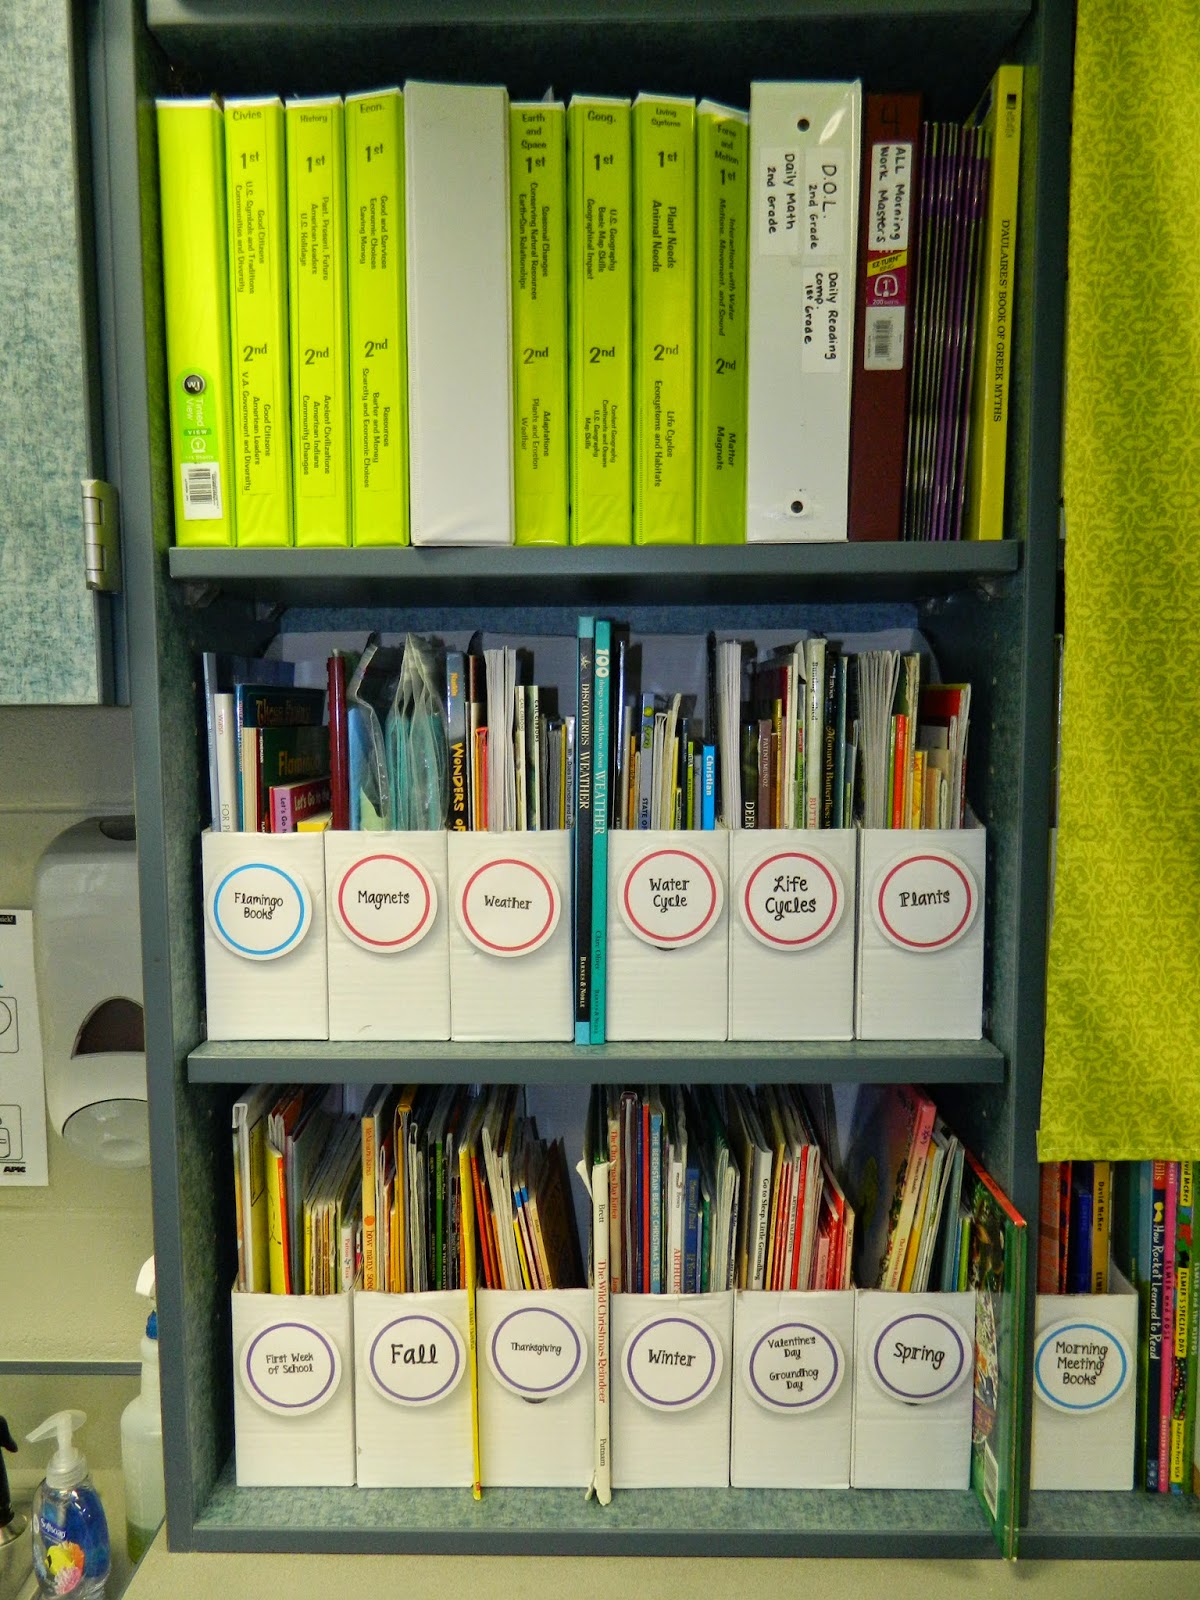
I'm not going to show you all my cabinets but I wanted to share this one because of my little hack with the magazine holders on the top shelf.
And my AWESOME birthday treat cups! They are supposed to have a pencil sticking out of the lid to make them look like milkshakes but the lids that came with my cups didn't have holes in them. Silly rabbits!
Still with me? Almost done I promise.
A different view of the storage. The curtains fit my old shelves perfectly. I really didn't want to spend $ on new curtains when these are only one year old so we are just going to roll with it people.
Under curtain #1
Under curtain #2
Curtain #3
And curtain #4
I decided to use my poster drawers for supply storage this year.
The top three drawers are supplies and the bottom three are my poster stuff.
Here's the room from the opposite end.
Hope you enjoyed seeing my space as much as I enjoyed putting it together!